How to Use PayCycle
Step-by-step guides to help you master your money, paycheck by paycheck
Adding Your First Primary Income
Primary income is required to generate pay periods and view transactions on the home screen.
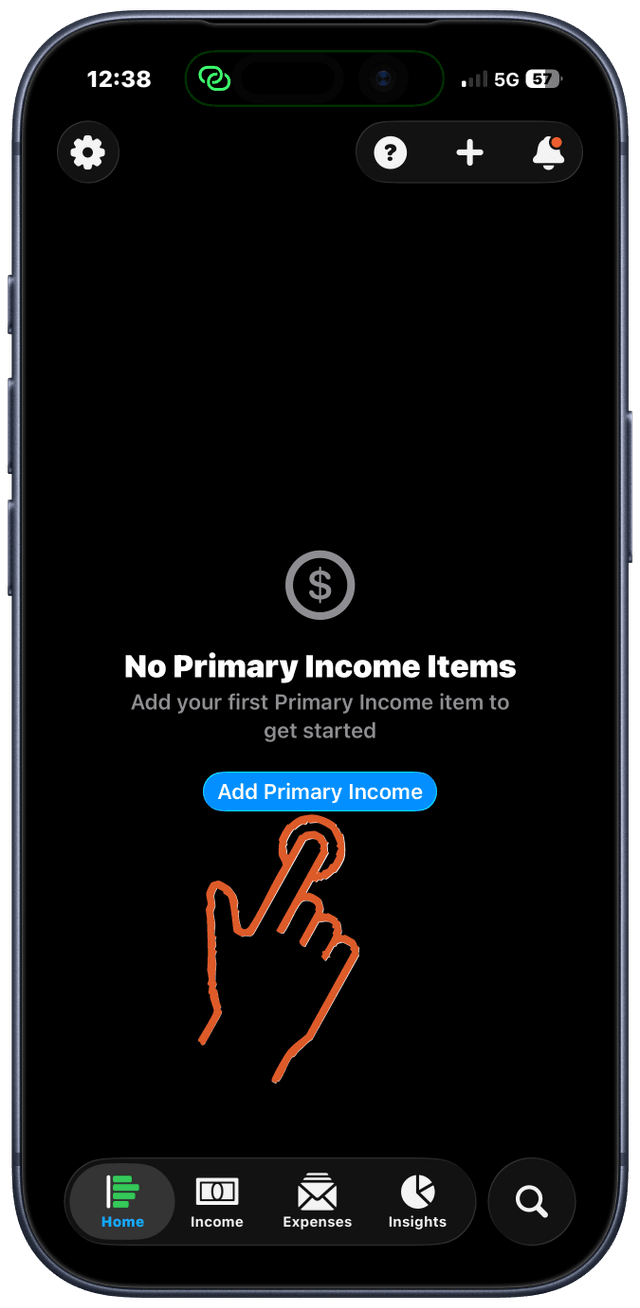
Open PayCycle to the Home screen
Tap "Add Primary Income" button
The form opens with "Primary" automatically marked
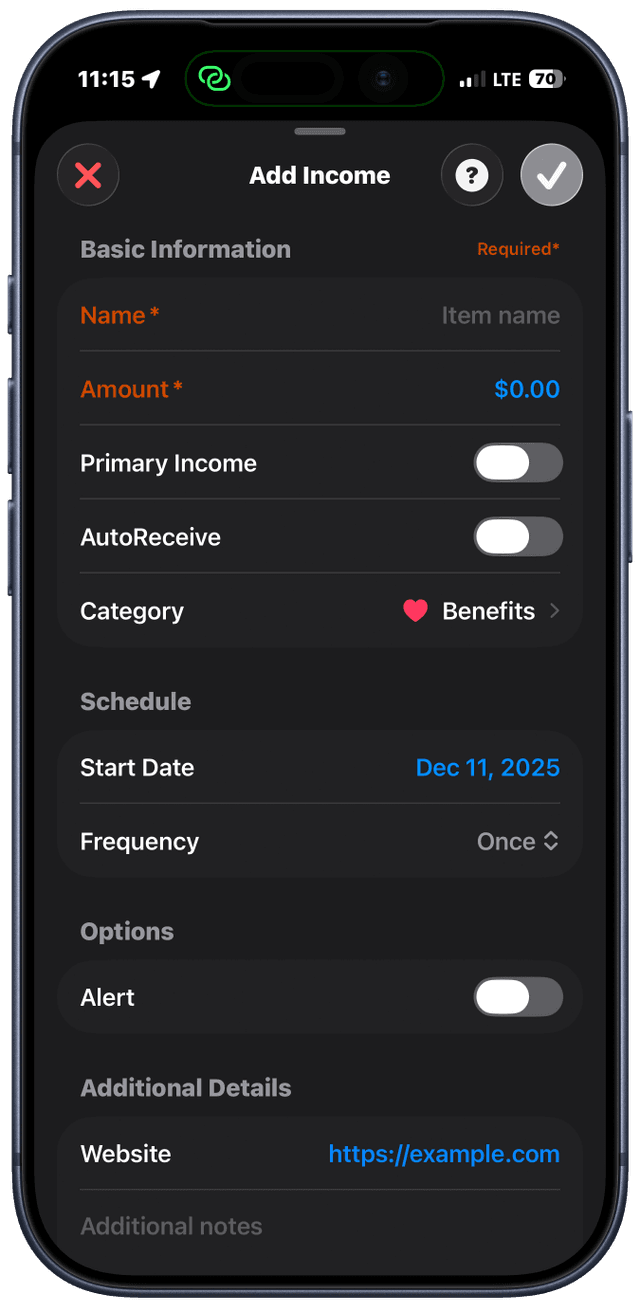
Enter your income amount
Select your pay schedule
Weekly, bi-weekly, semi-monthly, monthly, etc.
Choose a category and add a name (optional)
Tap "Save"
Without primary income, the home screen will remain empty. At least one income source must be marked as primary.
Tips
- Mark your main paycheck as primary to track your actual pay periods
- You can add multiple primary income sources for more detailed period tracking
Adding Additional Income
Add side gigs, freelance work, or other income sources.
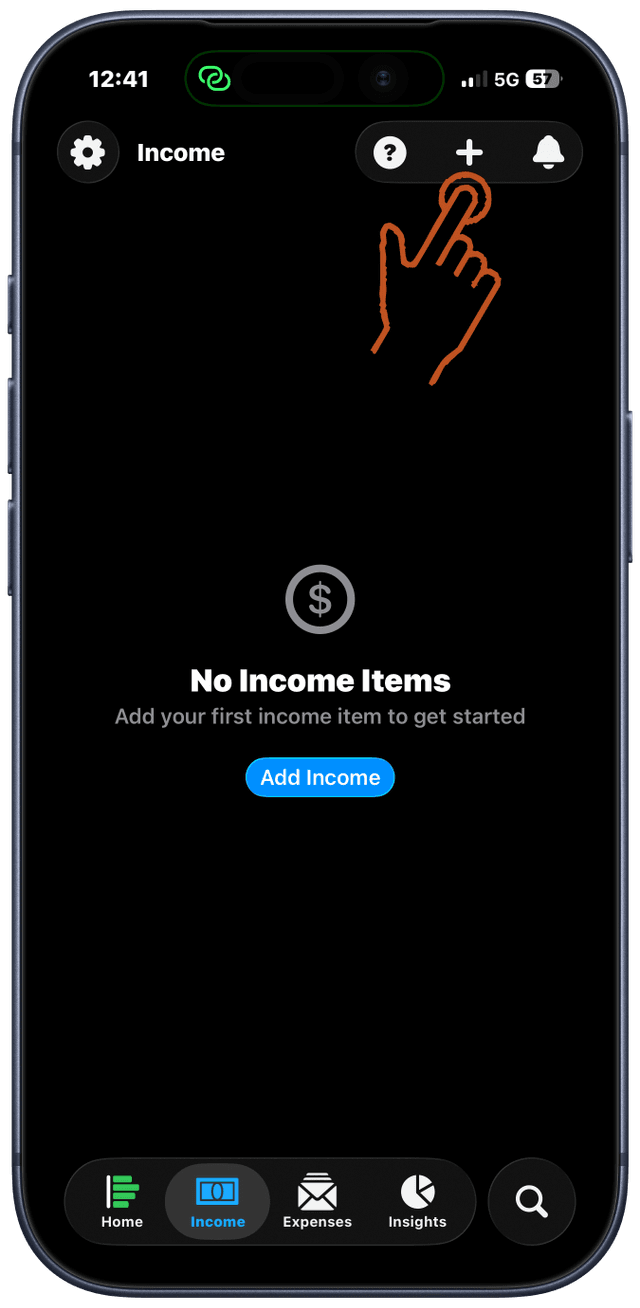
Tap the Income tab at the bottom
Tap the "+" button
Fill in the income details
Choose whether to mark as "Primary"
Primary income defines pay periods
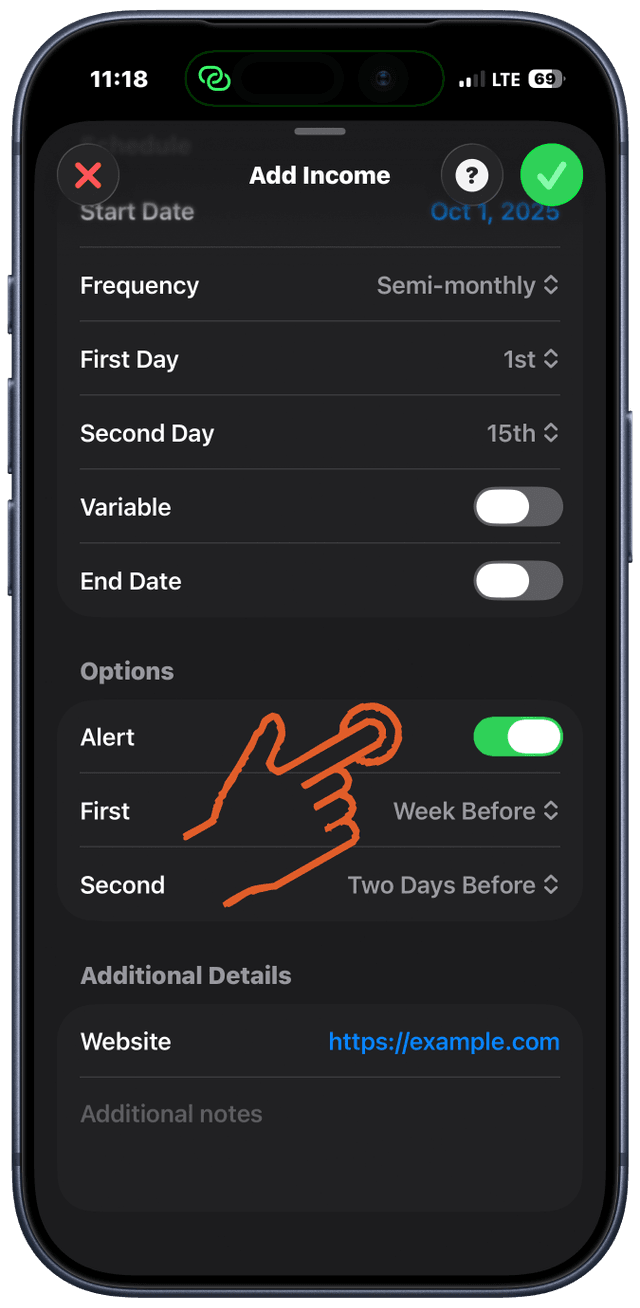
Set up alerts (optional)
Choose up to 2 reminder times
Enable "Auto Receipt" for predictable income
Tap "Save"
Tips
- Enable variable amounts for income that changes (tips, bonuses, etc.)
- Swipe left on any income item for quick edit/delete actions
Adding Expenses
Track bills, subscriptions, and recurring expenses.
Tap the Expenses tab at the bottom
Tap the "+" button
Enter expense amount and name
Set the due date
Choose recurrence schedule
Once, weekly, monthly, quarterly, yearly, etc.
Select a category
Set up alerts (optional)
Day of, day before, 2-3 days before, week before, etc.
Enable "Auto Payment" for bills paid automatically
Tips
- Use variable amounts for utilities that change each month
- Set reminders to never miss a payment
- Expenses automatically appear in the correct pay period based on due date
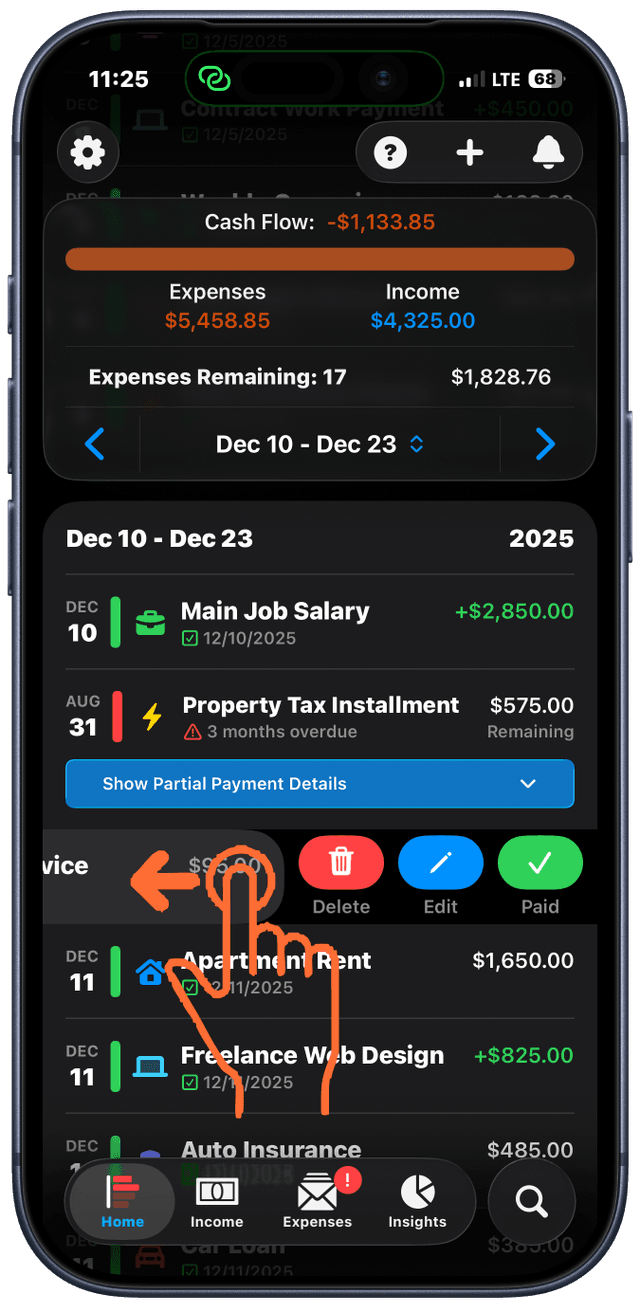
Marking Items as Paid/Received
Keep your cash flow accurate by marking transactions as complete.
Find the transaction on the Home screen
Swipe left on the item
Tap "Mark as Paid" (or "Mark as Received" for income)
The item turns green and your cash flow updates automatically
Tips
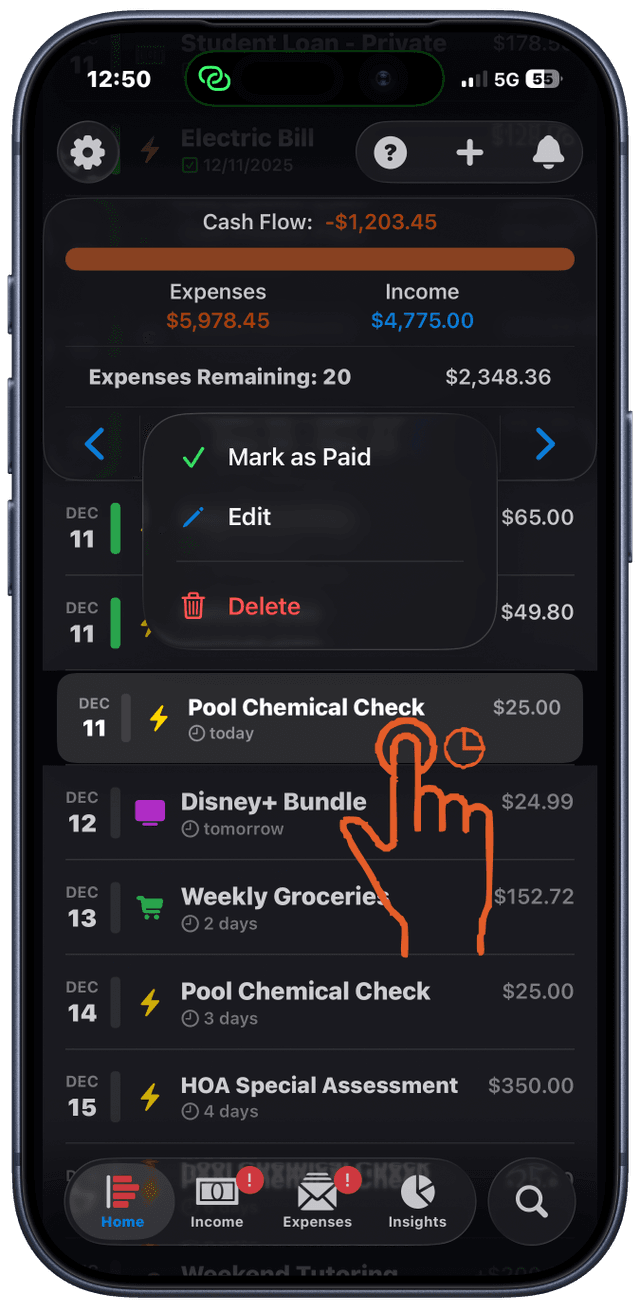
- Tap into an item to mark it from the summary view
- Green items are paid, red items are overdue, blue items are partial payments in progress
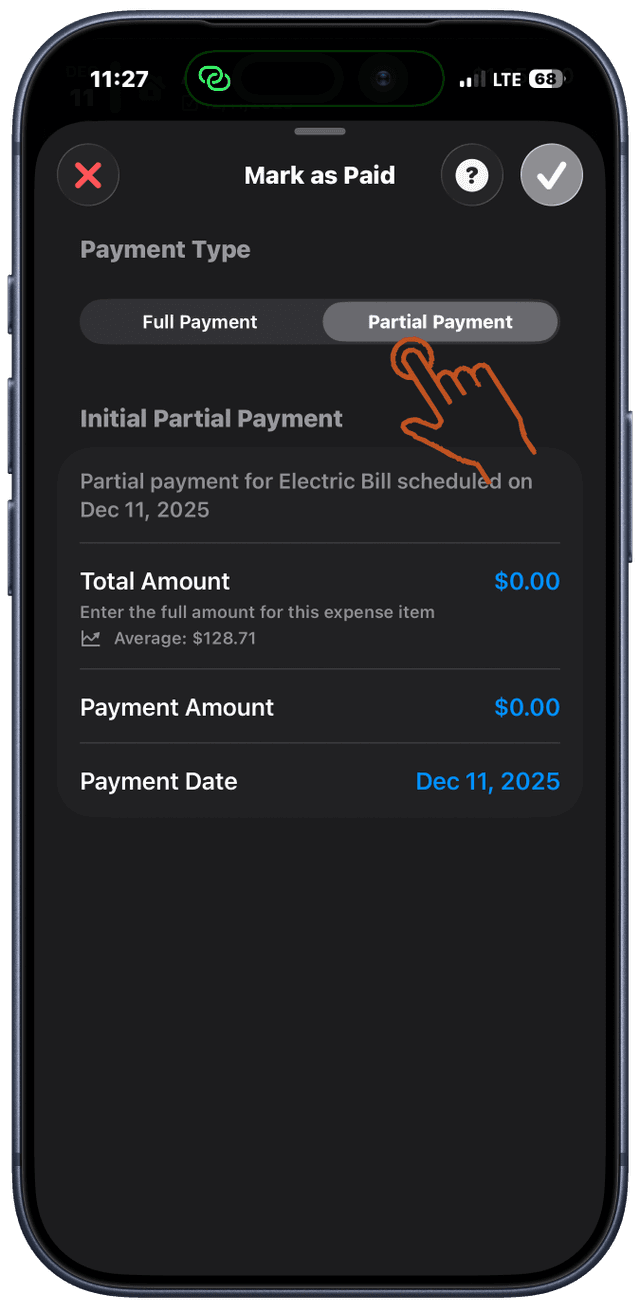
Setting Up Partial Payments
Split large bills across multiple paychecks when money is tight.
After selcting the Mark as Paid/Received button
Toggle on "Partial Payment"
Fill out the required inputs and save
When ready to make/receive another payment, tap the item
Tap "Add Payment"
Enter the amount you're paying
Track your progress with the visual progress bar
Tips
- Perfect for rent, car payments, or any large expense
- Progress bar shows how much you've paid and what's left
- Each payment is tracked individually in the period it occured, unpaid balances that are upcoming or overdue stay in the current or upcoming period
Editing & Deleting Transactions
Make changes to your income and expenses anytime.
Swipe left or long press on any item for quick actions
Tap "Edit" to open the edit form
Make your changes (amount, schedule, alerts, etc.)
Tap "Save"
Tips
- You can also tap an item to view its summary, then use the pencil icon to edit
- Delete option is also available in the swipe menu
- Changes update all future occurrences for recurring items
Setting Up Notifications
Never miss a payment with smart reminders.
Open Settings and enable system notifications
Or do this during onboarding
Edit any income or expense item
Scroll to the "Alerts" section
Choose up to 2 reminder times
Day of, day before, 2-3 days before, week before, two weeks before
Save your changes
Tips
- In-app notifications are always on and appear in the notification center
- System notifications can be disabled in iOS Settings
- Set alerts individually for each item
Managing Categories
Customize categories with custom icons and colors.
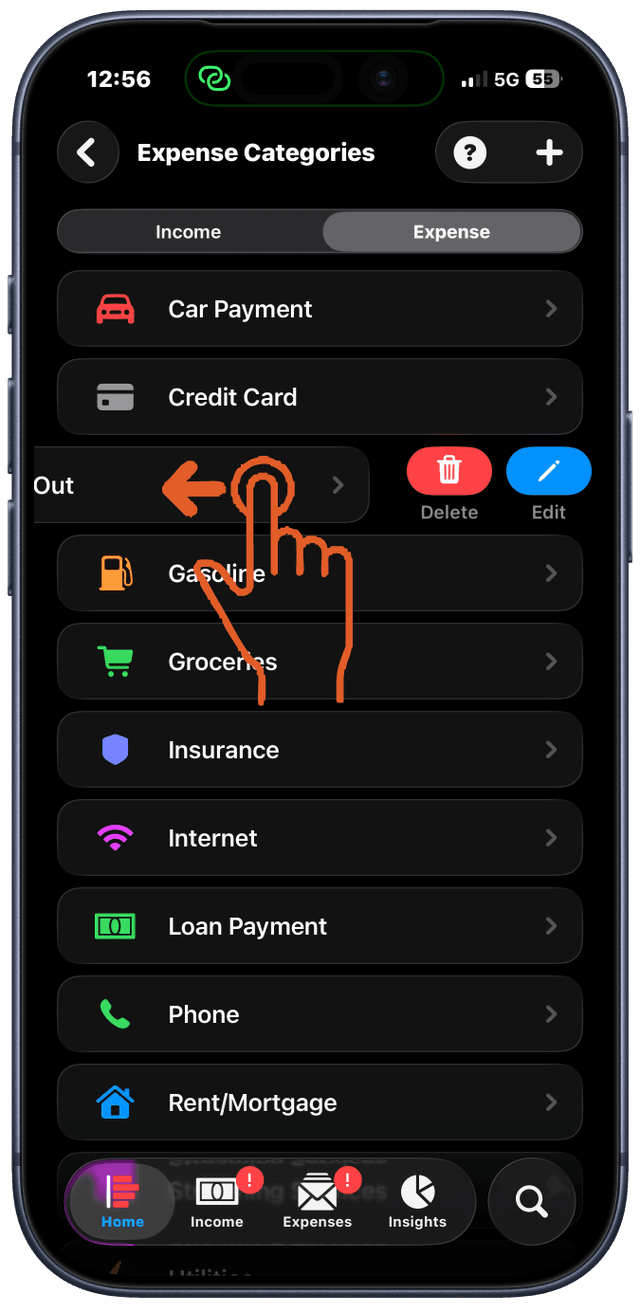
Go to Settings (gear icon)
Tap "Manage Categories"
Create new categories with "+" button
Choose an icon and color
Edit existing categories by tapping them
Delete unused categories by swiping left
Tips
- Income and expense categories are managed separately
- Categories help organize spending insights
- Create unlimited custom categories
Viewing Spending Insights
Visualize your spending patterns with beautiful charts.
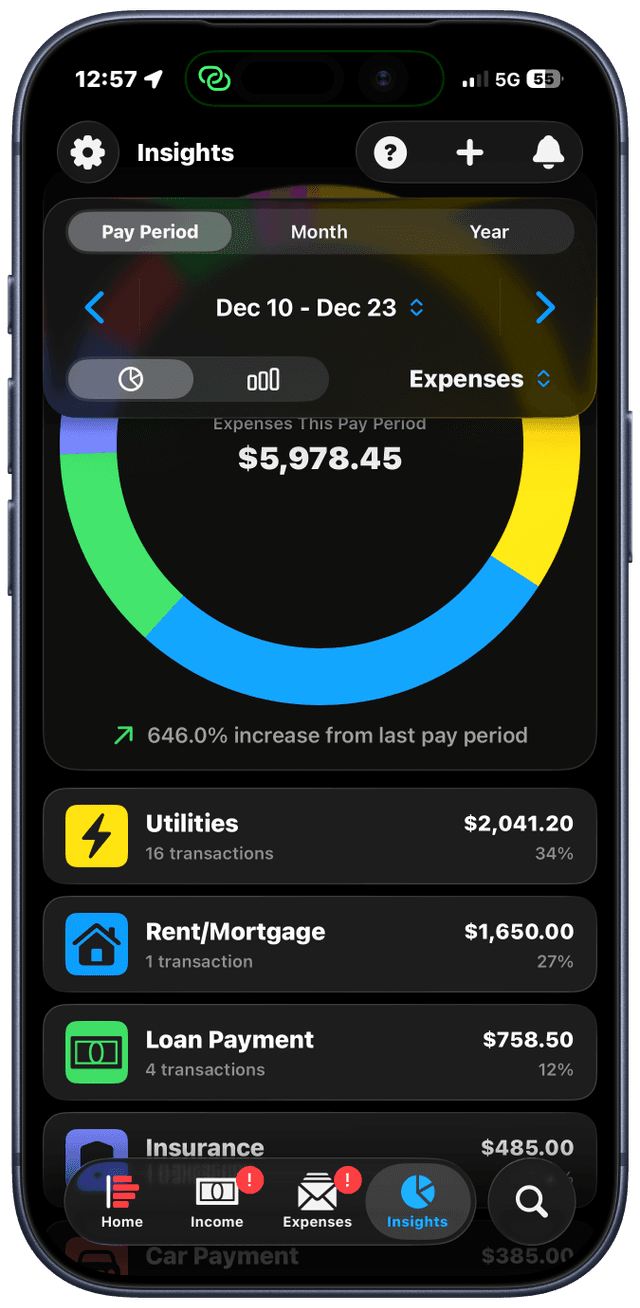
Tap the Insights tab at the bottom
View your spending breakdown by category
Toggle between time periods
Current pay period, month, or year
Tap categories to see detailed breakdowns
Tips
- Charts update automatically as you mark items paid
- Identify where your money goes each period
- Use insights to find opportunities to save
Privacy & iCloud Sync
Your data stays private and syncs across devices.
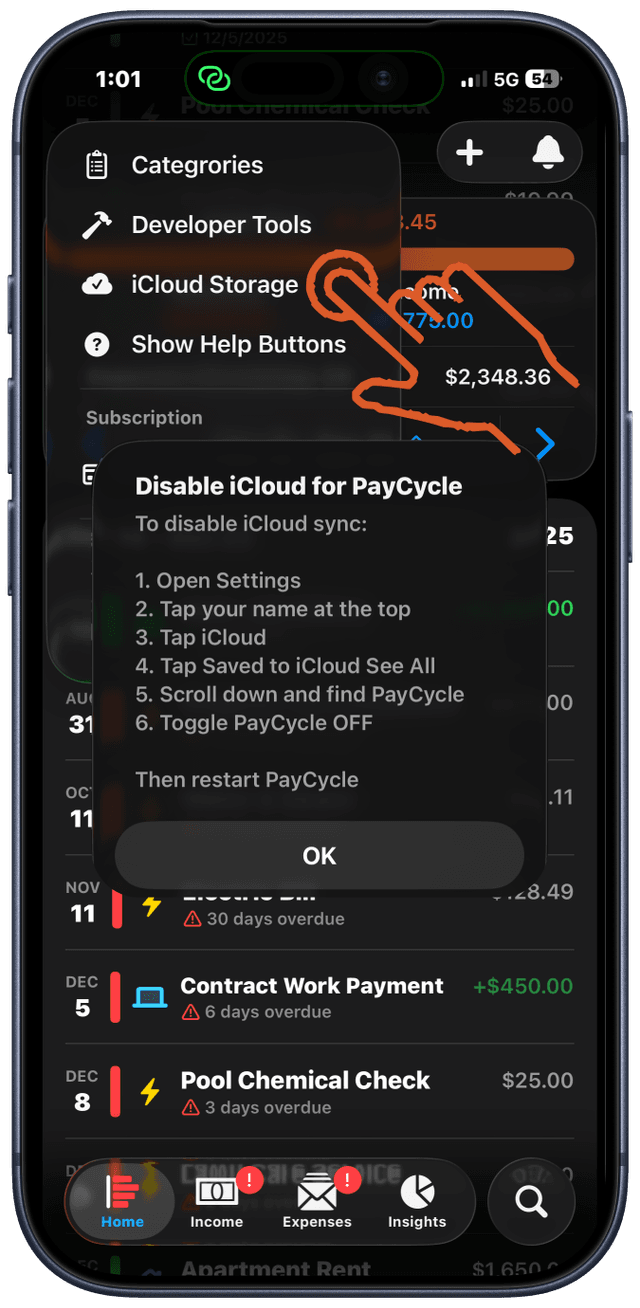
iCloud sync is enabled by default
Your data syncs automatically across all devices
To disable: Go to Settings > Toggle off iCloud Sync
Works offline - all data stored locally on your device
PayCycle never collects or shares your financial information. Everything stays between you and your iCloud account.
Tips
- Data is encrypted and only accessible by you
- Disable iCloud sync to keep data local to one device
- App works perfectly offline
Need More Help?
Check out our Q&A section for answers to common questions, or contact our support team at support@paycycle.info